Turn your dresses into skirts

makeskirtsfromdresses

This is not a new idea.  And you've probably done it before.  But, If your like me, even if you've done it before, sometimes a little reminder can turn the light bulb on.  My reminder was meeting a couple of sweet mama's at the beach the other day.  They were both wearing such cute skirts, and I made the mental note "I need some new skirts".  The next day, at Goodwill, I find two dresses, one was too big, the other was not a flattering fit on my bod.  The light bulb turned on.  

dressalteration

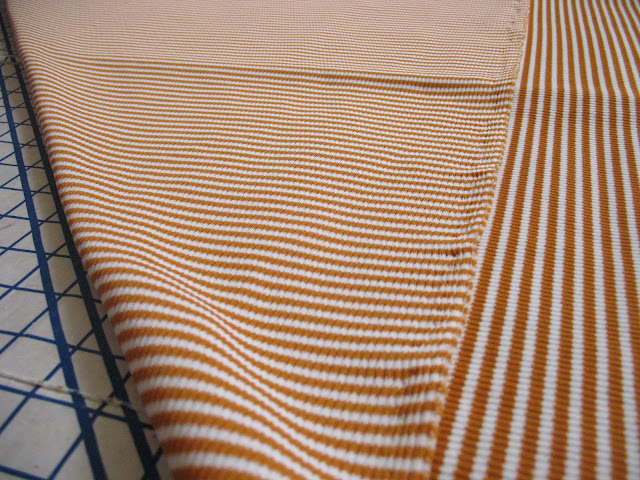
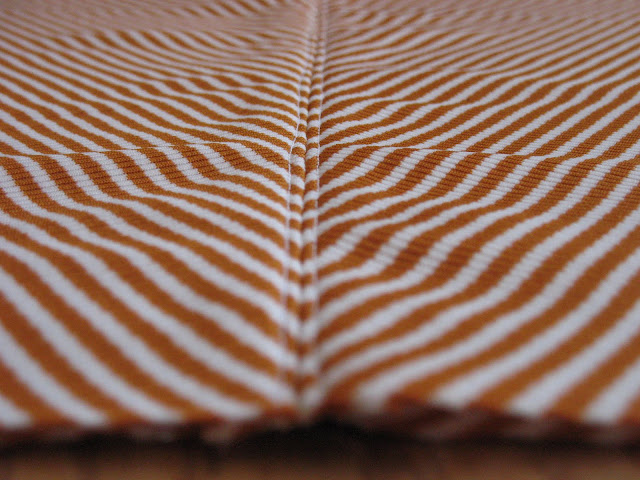
I can't even tell you how easy it was to turn this Billabong tube top dress into a long skirt.  It already had the elastic waist for heaven's sake!  All I had to do was cut that top part off, and hem the bottom to be the right length.  Done!

IMG_8549.JPG

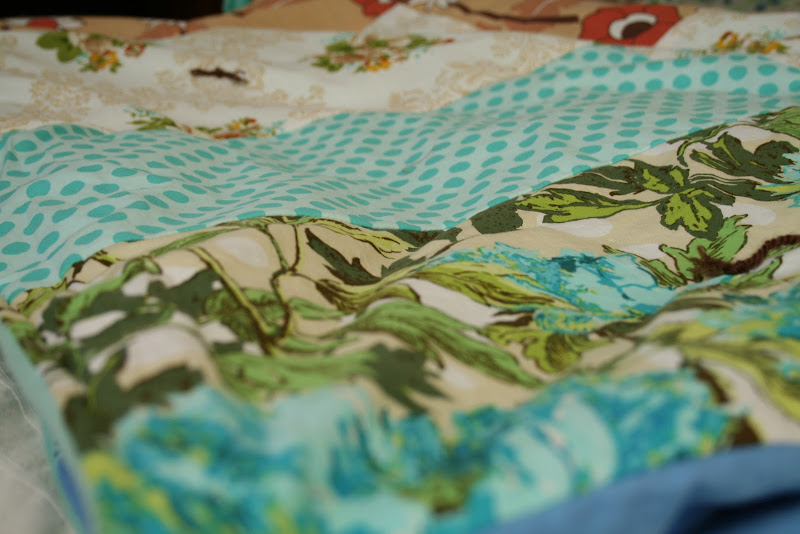
This dress was a bit large in the bodice, but I really liked that fabric and that bohemian feminine airiness.  Because the hemline was already so pretty on this one, I started at the bottom, figured out how long I wanted it, and cut the waist, keeping in mind how much extra I needed to make the elastic casing.  After the casing was sewn up and elastic threaded through I was done.  

Two new skirts added to my California beach mama fall wardrobe.  

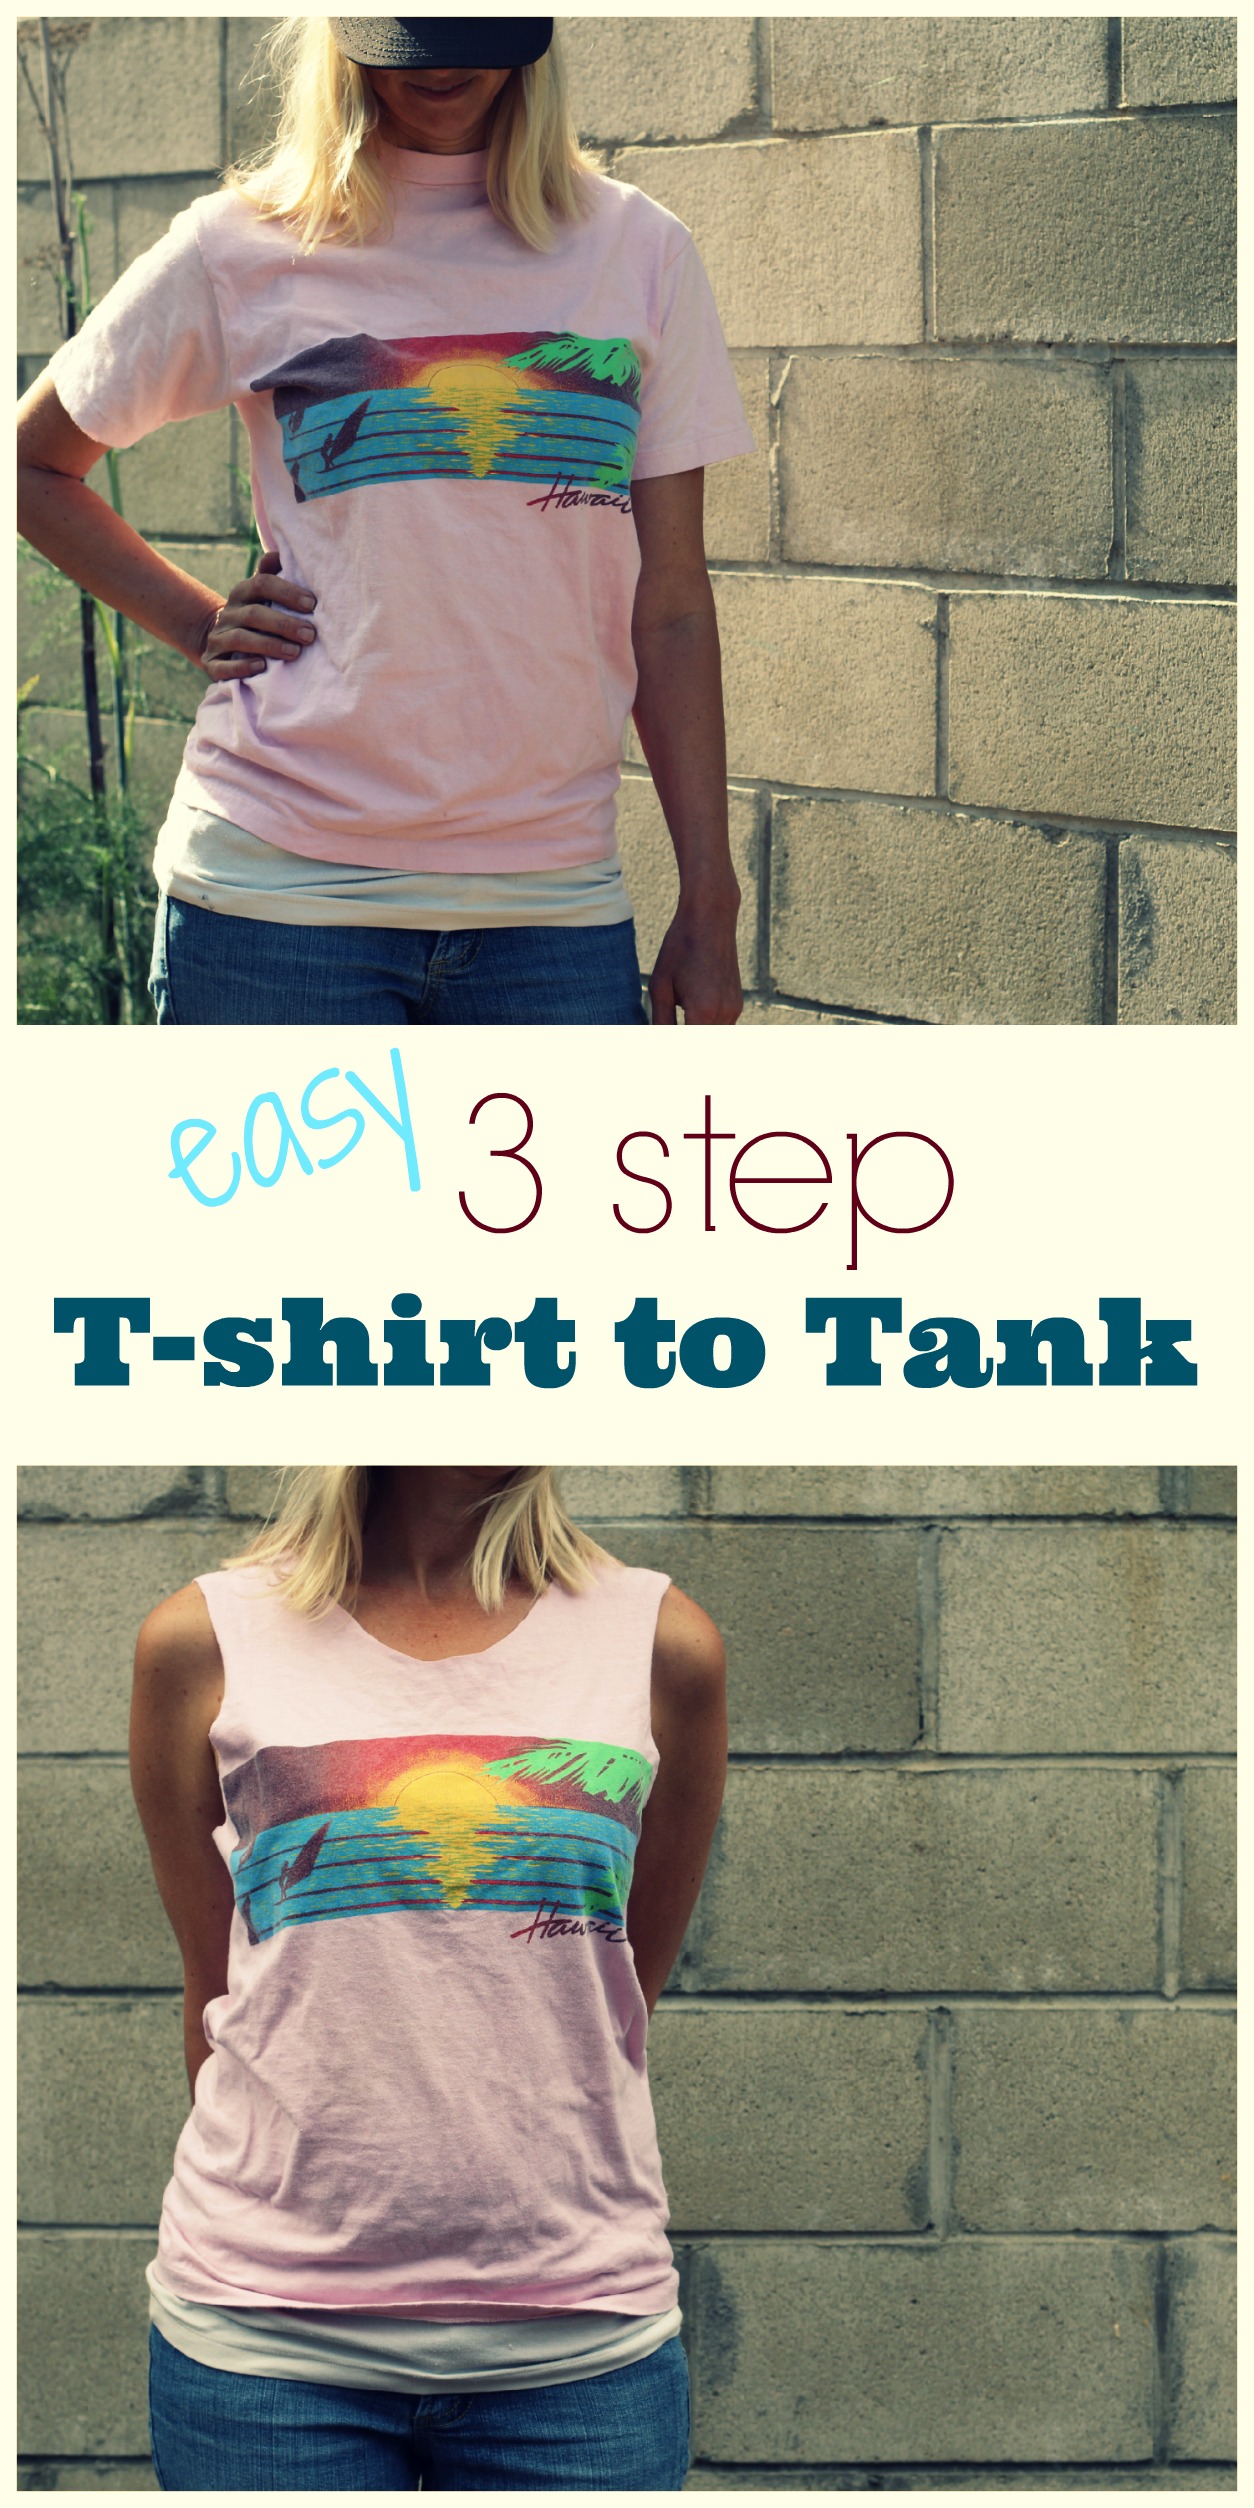
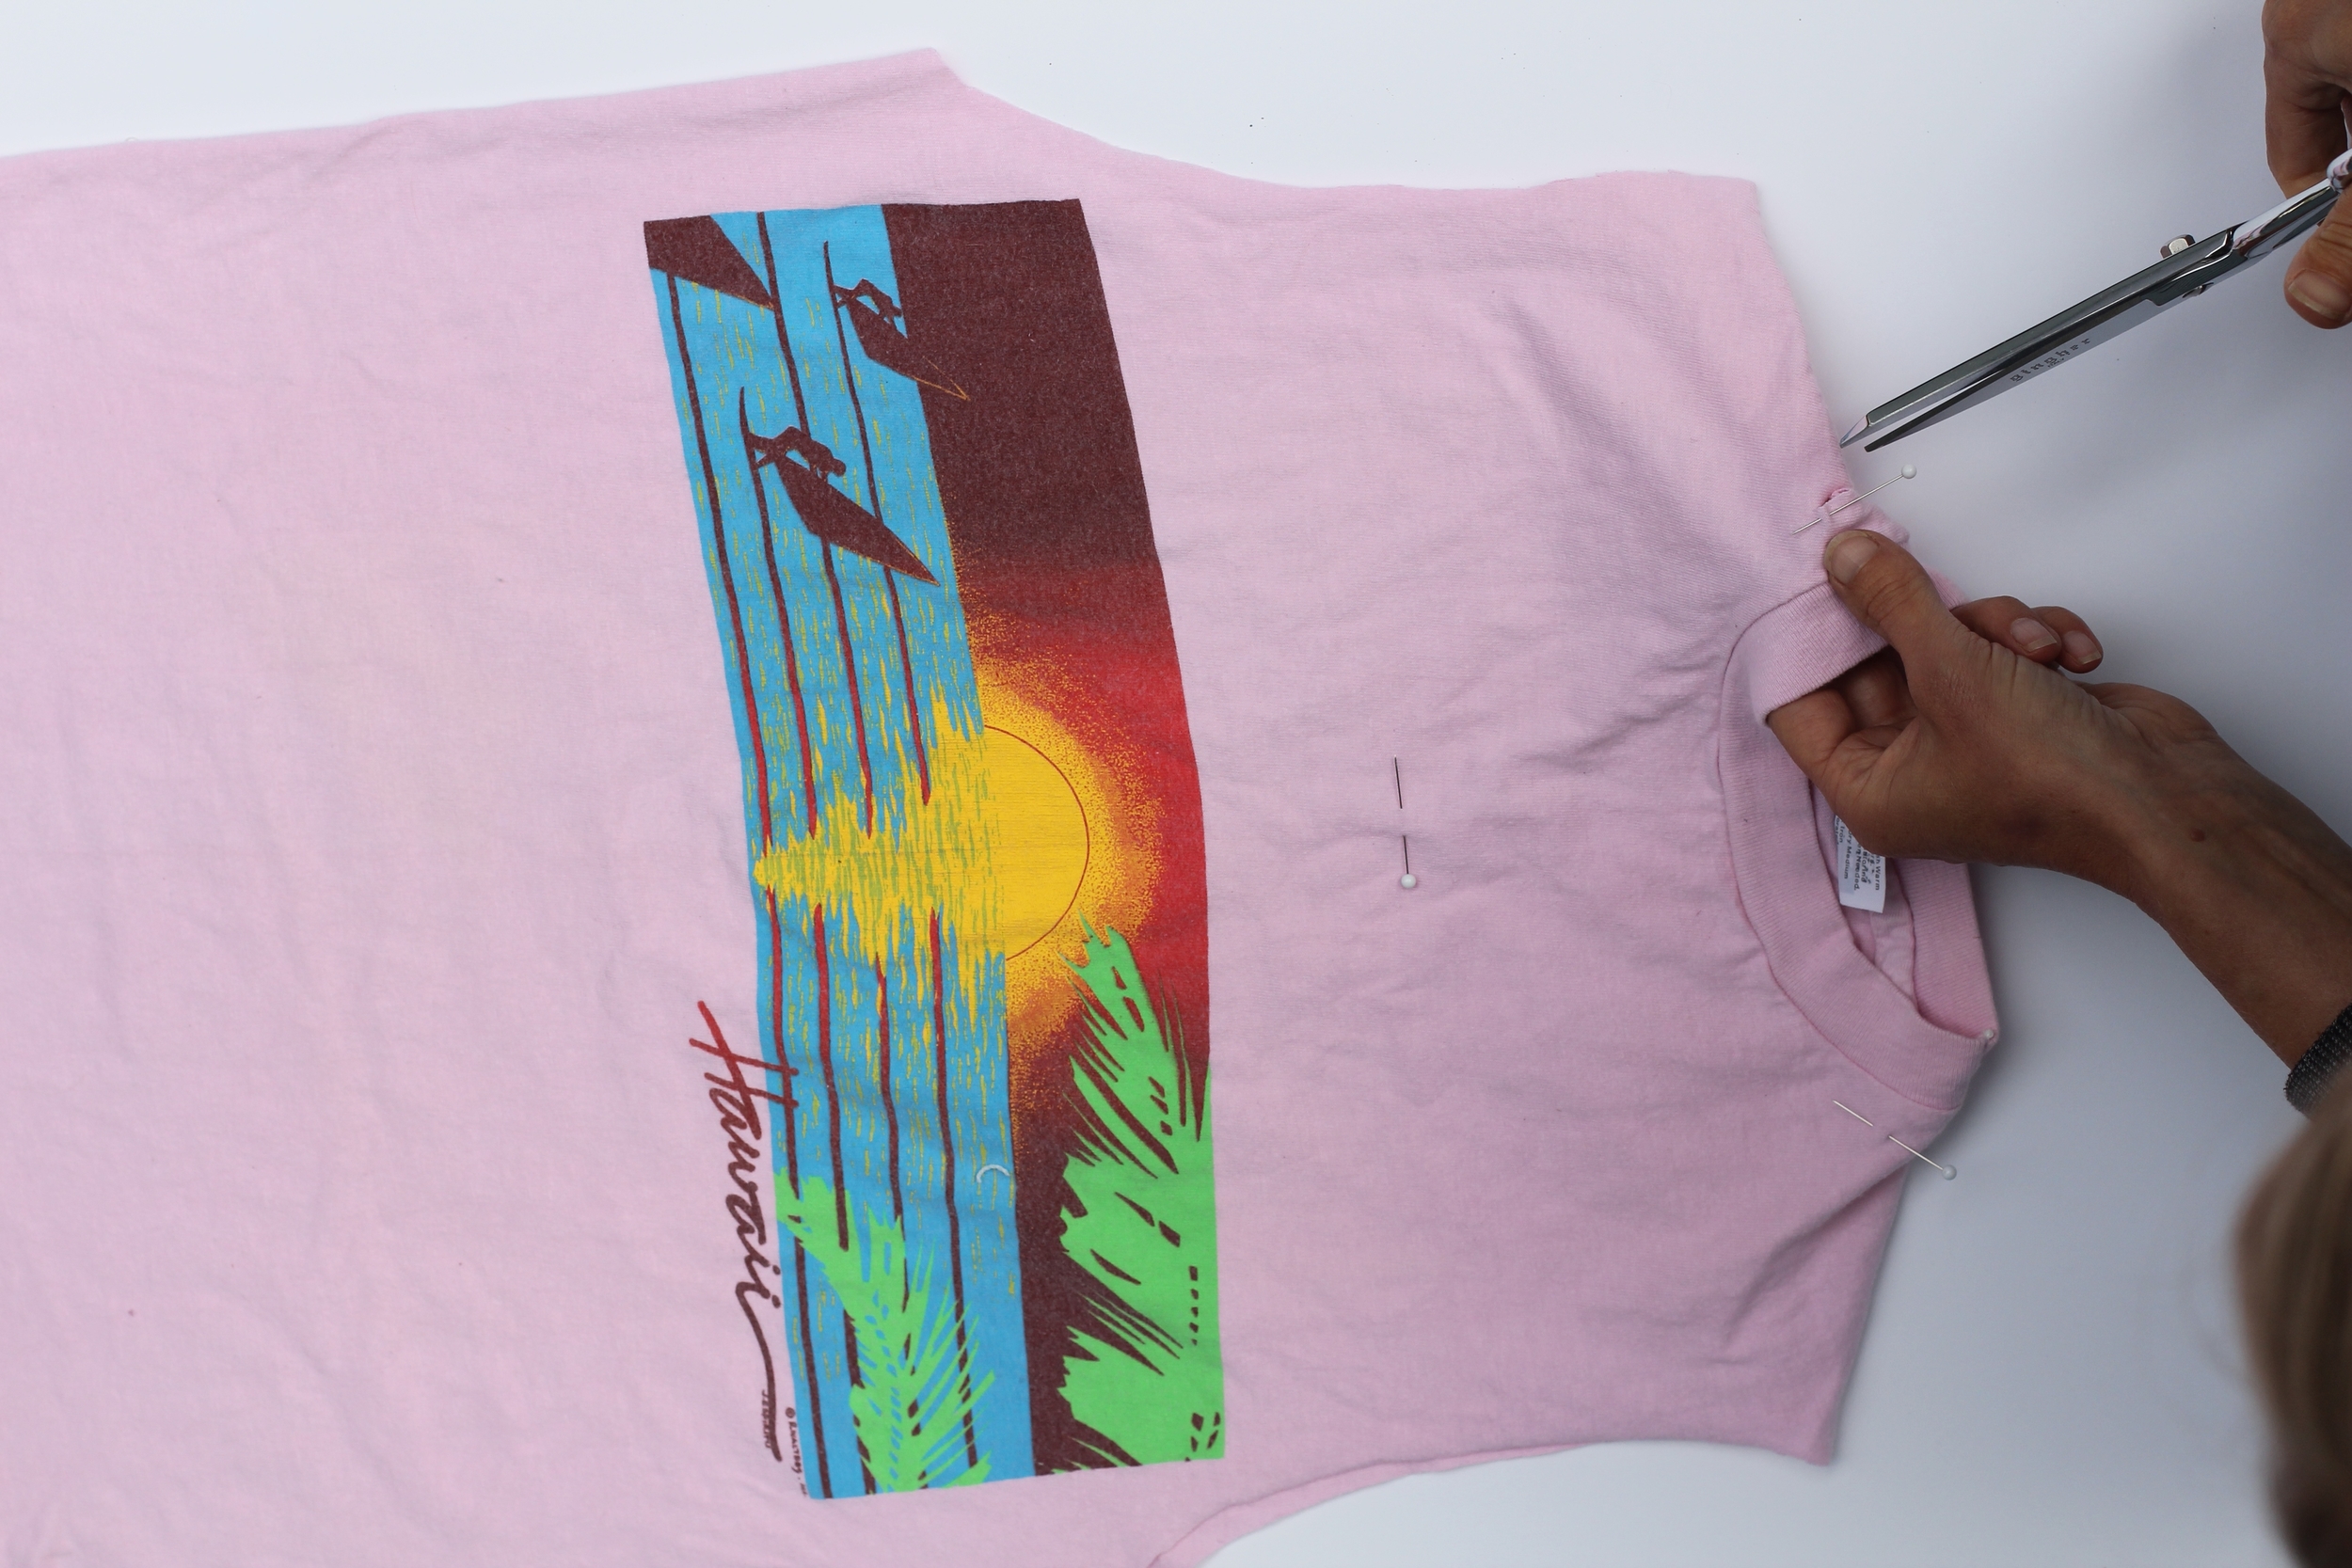
Here's another post to easily turn your t-shirts into tank tops.  Or how about changing the buttons on your sweater for a new look.

For more fall fashion inspiration, come visit my Pinterest board Cozy Town.


wip {works in progress} turns purge

So the other night, I was invited to a friends house for dinner.  Ginger showed us the things she had been making (she likes to make!).  I had a great time (she is a crack up, and the other guests are my friends too!).  And I came home with some fresh inspiration.

The next day I decided I NEEDED to make a quilt.  And I knew I wanted it to have a built in chevron pattern.  So I searched pinterest for all the different ways to make a quilt block that would combine with the other quilt blocks to make a zig zag pattern.  This one was so easy, and not full of a bunch of tedious piecing.  If you look closely each block is just a big square, cut into two triangles.  


The other thing I couldn't wait to get started on was a crocheted rug.  Ginger showed us this awesome trick with making long yarn strands out of t-shirts.  I loved it.  But, it was going to take me a while to collect enough t-shirts to make a rug the size I wanted.  I couldn't wait that long.  I moved to plan b.  My big stack of thrifted sheets was crying out to me.


Once I cut them up into long 2" strips, I started crocheting.  I'm using my big fat hook, and a double crochet stitch.  In these pictures the rug is about 2' x 3' and had used up about 3 sheets.  I am now 6 sheets into it, measuring roughly 4' x 5'.  I'm going to put it in the girls room and am going to make it a bit bigger still.  I'll probably end up using about 8 to 10 sheets.


What a great way to destash my fabric collection.  After clearing out so many sheets, I moved on to my other fabric stacks, and piles, and boxes, and bagged up 4 garbage bags of fabric that just did not inspire me any more, and sent it off to the Goodwill.  And that just opened up a flood gate of purging around here.  I'm still going...

summer beach season begins


School is out.  And that means it's beach season.  Except, it's beach season all year for my family.  But, I guess to make summer beach season feel more special, I decided to make a new beach blanket and beach bag.  I figure this is my equivalent to buying new patio furniture (which we won't be doing this year).  But really, the beach is I where I do a lot of my summer time entertaining, and I can enjoy a good friend and a cool drink on my new beach blanket as easily as I could on new patio furniture.


 The bag is white and orange-y patchwork.  Extra roomy, with padded straps and lining for durability and comfort.  I also put in some large zipper pockets for the essentials: sunscreen, hair ties, surf wax.


This last year when I taught embroidery lessons to a sweet group of girls, my girls and I had some pretty little embroidery pieces that needed homes.  I decided to put them here and there on the beach bag.


Ginger mastered the chain stitch and lazy daisy stitch.  How could I not want to look at that all summer?


I made the blanket and the bag a sort of a set.  The blanket is a white, aqua, and orange patchwork, with some pieces of my old beach blanket and the awesome vintage trim from my old beach blanket.  I couldn't say good bye to that. 
 What makes summer special for you?


neon prairie girls

Next week my new sewing class begins.  It's going to be a beginners Embroidery class!  We will be studying early American History this trimester in school, and didn't all those prairie girls embroider?  My little students will learn the basics, and then make their own, modern day sampler.  (neon colors included!)

I was about 8 when I learned how to embroider.  My family was living in Kentucky then, and the winters were long and cold.  After a fun afternoon of sledding, I can remember curling up by the fire and following along with the Reader's Digest Complete guide to Needlework learning all the stitches there were to learn.

I can't wait to relive my fond memories of learning this new skill while I teach those eager modern day prairie girls!

crochet pillows in the shop!

Thanks to all my friends and family who shared the words of encouragement through my rut a couple weeks ago.  I'm feeling fresh and free once again!

These pillows certainly were good medicine for my lack of inspiration.  The patterns and colors perked me right up.  I've made a handful of them for my shop.


They will instantly perk up any couch, bed, or chair.  Bringing their retro cottage style with them!


They are made with a colorful crochet top and a vintage fabric envelope enclosure for the back.


They are stuffed with a 14" x 14" pillow form.


Find them here in my shop with different colors and patterns!

fresh new pj's


 I made some new pj pants, just like I said I would.  I have actually been wanting to make these for quite some time, and it was so refreshing to just sit down and do it.  I have such a large stack of vintage sheets, and I knew that would be the perfect thing to make these out of, super comfy and soft.


Instead of taking a pattern from a pair of pj pants I already had, I thought I would save some time and use the Amy Butler lounge pant pattern from her In Stitches book.  I altered the leg shape a bit by making it slightly less wide and added just a bit of curve to give them a wide boot cut shape leg.  I was a bit disappointed in the way the Amy Butler pattern fit around my booty, though.  The pattern didn't have enough curve in it, and ended up making my booty look like it was completely flat.  Thankfully, these are just pajama pants, and a flattering fit is not very important while sleeping.

lacking and looking for inspiration

My inspiration left me this week. All of a sudden. I'm not sure it had ever happened to this degree before, ever. I did not want to make anything. I couldn't think of anything I wanted to make. I just sat on the couch, looking into space, not interested in making at all. I was even thinking that I would stop making all together, forever. Just be done. Well, that was all ridiculous, really. Who was I kidding. I need to make. I just had to look back over my life to see how much making was a part of it.

It started coming back to me. Slowly, and in small amounts. I made a baby hat. Not my regular, tried and true baby hat. Something completely new and different. I just made it up as I went. I needed freedom.


Then I dug up the wooden hangars I had buried somewhere. I put some yarn on one. I liked it.


It's all baby steps. Next, I want to make a new beach blanket. Something simple. Something for me. Maybe even some new pajama pants out of my big stash of vintage sheets. For me.
Baby steps.

texture all around

I've really been enjoying my photo a day challenge. I'm pleased to find that it hasn't been a burden at all to take at least one photo every day. Megan and I did find, however, that we were challenged with "what" to take a picture of. So we gave ourselves a category of the week. We decided that we would look for "texture" as inspired by Little Brown Pen.
I was actually surprised at how much texture I could find in my little world.


This little orange frog sits on the window sill above my kitchen sink, next to his buddy the turtle.


I loved this texture in such a massive scale on Morro Rock.


The texture on textiles has always grabbed my attention, but what about the texture of a bright ruffle?

I found even more texture photos this week over here.

just a few things...

Here's just a few things that have already happened around here, are happening around here, or will be happening around here soon...


1) Already happened: Over our winter holiday, I upgraded our front porch chairs to these plastic adirondack loungers. (A big improvement, trust me). And I made them more comfy and inviting with these super duper easy envelope style closure pillows. This is one of my favorite places to "be" at home.

2) Happening today: We will be making these cute heart garlands in sewing class today. I just love watching the busy little fingers at work!

3) Already happened: I've recently finished a crochet lap blanket inspired by this one. I started it over a year ago. This is not normal for me. I am the kind of person who very diligently finishes every project I start, whether it's a good idea to or not.

4) Will be happening soon: I'm looking forward to playing at least one scrabble game with my good buddy, while our husbands watch the super bowl while our kids quietly play in the back ground. (this may be a bit of exaggerated bliss, but my rose colored spectacles are usually not far out of reach)

Have a good weekend!

button craft


This Friday in sewing class the kids are going to do some button work. They just love buttons! Why is that? When I get to the button sewing part in whatever project I'm working on, I'm usually not that eager. But these kids could sew buttons all day long.


What I have them do is draw an outline shape onto their felt, and then fill it in with buttons to "color" their picture. This craft very much reminds me of one of my favorite Queen Bee Market vendors,Audra from Smitten. She makes some beautiful button art, along with restoring great vintage items.


It's also a great way to use up that huge can of buttons you have in the cupboard!

i use cloth napkins because they're pretty


I like the way they look. They make all our meals feel special. They feel good on our hands and faces. And it's just what we're used to.

Because I use them for their beauty, I was very sensitive to the fact that ours weren't beautiful anymore. After many years of service they had become faded, stained, and worn. It was time to make some new ones.


Along with the vintage linen white napkins (still in their package) my neighbor gave me, I also made about a dozen or so colorful napkins. They are so easy to make. If you start with a fat quarter of fabric (18" x 18") all you have to do is hem the edges 1". They are also equally easy to buy premade!


I keep a small basket in the kitchen where we throw our used napkins (after they're actually dirty). Then I wash them about once a week. The girls fold them and put them away. We have a large stack (about 30) so there are always clean ones ready.

Do you use cloth napkins? What's your reason?

sewing lessons :: needle book

I will begin teaching my 4th session Beginning Hand Sewing class this Friday. I just love this class! The students are kinder through 2nd graders (girls and boys!). I've been learning alot about how to teach this craft I love so much. Keeping the projects simple (with room for my advanced students to grow), and keeping my expectations realistic have been my main focus as a teacher. We use mostly felt for our projects which is so easy to work with and comes in amazing colors.

I often start each session (an 8 week course) off with a simple needle book. The kids love being able to create something they can use. This needle book shows them the importance of using a pattern, how to pin, and of course, the fun part, sewing!

Simple Needle Book Tutorial


1. We start with a paper pattern roughly measuring 5" x 3".
Pin that to your fabric (felt).
Do this 2 times so that you have two pieces of felt measuring 5" x 3".


2) I cut a small amount off each edge of my inside piece. Then lay one piece on top of the other and pin at the center line.


3. Sew both pieces together at the center line (right along the pins).


4. Cut a small rectangle about 1/2" x 2" out of felt. Sew this to the middle of the outside opening edge. This will be the button hole flap.


5. Sew a button on the other top opening edge. Cut a slit in your button hole flap (this is your button hole).


6. Now your book is complete! At this point, any children who get done early can embellish their front cover however they like.


When the book is done, the students get to keep their needle and pins tucked away for next class!

the 3-hour patchwork quilt {how-to}

Every Christmas, for as long as I can remember, I've made my girls jammies. This year, I couldn't rationalize new jammies, when even though they each had drawers stuffed with them, they would rather wear one of their daddies XL t-shirts to bed.
So this year, I decided I would make them each a new cozy, colorful, layer for their beds.

This was such a simple, and quick project! It really only took about 3 hours to make each one. It has a patchwork top and a blanket underside, all held together with yarn ties spaced across the top. Sewing time will vary depending on how large your patchwork blocks are. I started with a twin size microfiber blanket from Target (which cost $13).

The 3-hour Patchwork Quilt How-to

1) Measure your blanket. (mine was 66 x 90) Decide what size and shape you want your quilt blocks to be. I made my blocks 22 x 10, then added an inch to each dimension for seam allowances (23 x 11). I then decided I would make 3 rows of 9 blocks and then off set the blocks in each row for a bit of interest.

2) Sew your blocks together. Iron your seams. (Everything always looks so much better when you iron!)

3) Lay your blanket on the ground face up, smooth and straighten it. Lay your patchwork over your blanket face down, smooth and straighten it. Pin your edges together. Sew your edges, leaving about a 12" spot open to turn your work right side out.

4) Turn your work right side out, and poke your corners out. I didn't iron my edges this time. I was afraid of putting the iron on the microfiber, and the blanket had enough stiffness that I was able to go ahead with the next step.

5) Top stitch the outer edge to make it look nice and tidy.

6) Lay your new patchwork quilt out on the floor again, and smooth and straighten it. Tie both layers together using a yarn needle and yarn. This keeps the layers from slipping around and looking sloppy. I put one yarn tie in the middle of every other fabric block.

This patchwork quilt works great as a layer to cozy up your bed, or for a lightweight coverlet on warmer nights. My girls love the cozy underside, and the colorful topside.

You could even make this using a sheet on the top, and fore go the patchwork step altogether.

how {not} to make a bias cut skirt: a tutorial

I've made a lot of clothes in my life. I started with Barbie's wardrobe when I was 6.
I sewed my way through college as a costume design major,
and am now sewing clothes for my daughters, and all y'all's daughters too!
I never use a pattern, but often start with something I already have that I like.
But that doesn't mean I do it right every single time.
Usually it doesn't turn out just how I planned,
and there is some alterations that take place before I will actually wear it.
If I like it enough to make it again, I'm one step closer to making it perfect.
The more I make it, the better it gets.
But you've got to start somewhere.
And you've got to not be afraid to just start, and maybe do it wrong.

Here I will show you my first attempt at an easy peasy bias cut skirt
that I do actually wear (in public).


I knew I wanted to use this rust striped polyester I picked up at the Goodwill.
It has a bit of stretch, but not much.
And I wanted a seam up the front with the stripes pointing down.
To cut on the bias means that you are cutting at an exact 45 degree angle from the selvage edge.
An easy way to acheive this is to fold your fabric like you do a snowflake.


I had a skirt that fit me well, so I laid it on top of my bias fold
and felt confident that I would get the right size piece (remembering seam allowances).
But here was my mistake:
I cut both layers.
Which meant that my stripes were not going to meet up in the center.
They both went from high on the left to low on the right.
I needed to cut out another piece to mirror the first,
and then repeat for the backside.


Once I got all four pieces cut out (front and back).
I evened up the hemlines, sewed the seams, and did a topstitch.
I really wanted the look of the topstitch,
and often with polyester anywhere you want a crease, you need to sew it in.
(remember sewn crease front polyester pants?).


For the waistband I just made a long wide strip with my high hip measurement,
including seam allowances.
I doubled the width I wanted it to eventually be,
folded it over and sewed it to the top of the skirt.
Here's what I did wrong:
The polyester does not have much stretch, and so the waistband fit my hips,
but was not tight enough on my waist.
This meant that I needed to retrofit my waistband to fit my waist more snug.


After taking longer than I originally planned (picture a good amount of seam ripping here),
the skirt was finally wearable.
And I actually love it.


From blog photos

out of balance


do you ever feel like you're out of balance?
like you need to do something very different than what you have been doing
for fear of going insane?
i tend to do this to myself every so often.
it starts out as me getting a routine, and a rhythm,
enjoying something so much so that i want to keep doing it.
i start to not be doing other things
(things that i really shouldn't be not doing, like cooking dinner for the family).
and then all of a sudden it hits me.
i've lost my balance. my daily balance.
i sit down to do my favorite thing at the moment (often, sewing)
and i get this odd feeling inside,
perhaps a bit like it would feel if you were about to go insane.
this feeling tells me i better do something else, and fast.
usually what i need to do is get outside,
spend some time exercising in the fresh air.
and then i need to figure out
how to bring that important balance back into my day.

i get a similar feeling when i can't stop eating the cookie dough.
do you ever get this feeling?
Add Image

different, but the same

the tea dress is a must. one of those dresses your girl can do anything in. from parties to playgrounds to school to the beach. i actually had one customer say that her daughter asked if she could sleep in it!

this season, the tea dress has a cute little bow on the front waistline. a fresh new look. same comfortable fit, same colorful recycled vintage prints.

i've just filled the shop with a bunch of these in sizes 2 to 8.
perfect for easter and spring!


***coming soon... the stitch market...april 28th and 29th...a local boutique***

laughing and stenciling


what a super fun time i had the other night at my buddy ginger's house!
she was celebrating the end of a very busy season for her
by having a handful of crafty friends over to learn along with her the art of freezer paper stenciling.

ginger may possibly be the funniest person i've ever met.
i don't know if i stopped laughing the entire night!
we had a fabulous meal, a fun tour of her studio,
and learned a new (totally doable) craft.

i have seen this craft recently explained on emily sparks blog
(who is very adorably pregnant).
and i'm sure there are a hundred other tutorials out there.
although, i really do enjoy the in person tutorial, myself.

knowing i was just going to be learning,
i decide to make a few very simple patches to sew on to my girls' library bags.
the girls were pleased.

thanks ginger for the fun night! and kristina for showing us all how!!